Property Extensions by FarrellWolst
A property extension can have different advantages to your home. A well designed, planned and constructed extension can add a tremendous amount of value to your home, not just by increasing the value considerably, but also the value in expanded the space you currently have, to cater for a growing family or perhaps family members moving in, making it an incredible investment. This all without the stress of selling and buying a new home. In fact, we would go so far as saying in the time it takes to sell, purchase and complete a new home purchase, an extension will have been completed with weeks to spare.
At FarrellWolst we have an enormous amount of experience in precisely this sort of work across the North West. We have over 20 years involvement with building top quality house extensions, and realize that picking a builder for your home extension venture is about considerably more than simply the nature of the work that they produce. It is vital the contractor chosen to carry out the works is competent, of course, but there needs to be great communication, patience and understanding of the task and the disruption an extension can bring. We are so proud of the work we carry out, and the reputation we have built, that we have chosen to put our surnames on everything we do; FarrellWolst.
What does a Home Extension Entail with FarrellWolst?
1. Planning your Build
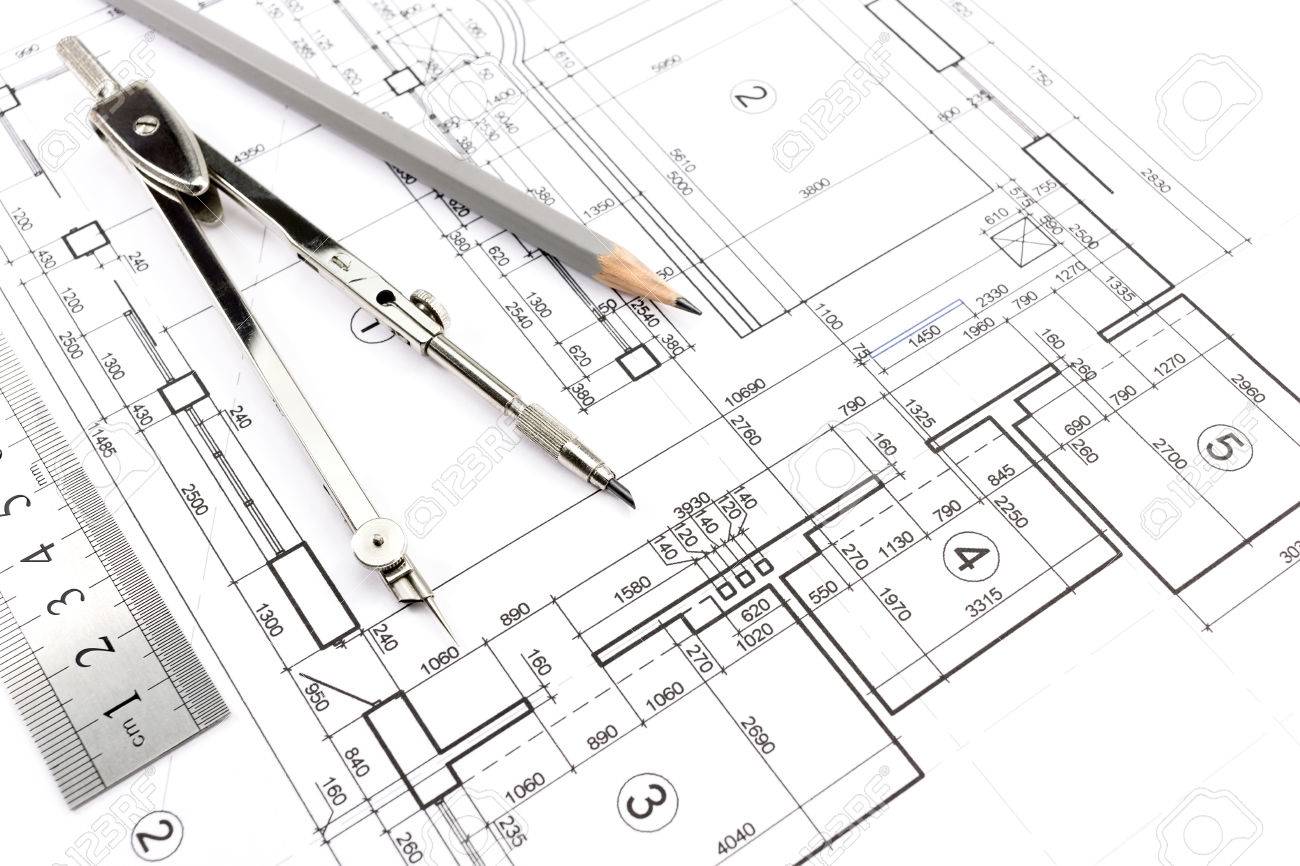
We offer initial advice and assist with idea generation, and have some incredible interior and exterior designers, along with architects whom we work with and can of course utilize during the initial planning of your project.
Following initial idea generation, the architect of your choice and the structural engineer (who works closely with the architect) work their magic, and of provide official drawings for which we will work off of, and adhere to during the build stage.
We have a very open and transparent way of conducting business, and being honest, with unrivalled communication throughout, is extremely important to us, in order to maintain a great and effective relationship with our client throughout the project.
Once we have been selected as the contractor, our work turns to producing and suppling the following documentation, setting the tone, for an organized and structured working relationship for the coming weeks and months ahead;
- Weclome / Thank you pack
- Defect Liability Clarification document
- Schedule of Works
- Payment Schedule document
- Building contract between FarrellWolst and Client.
We also provide our first ‘weekly summary’ email, detailing progress and activities due to be carried out during the following week.

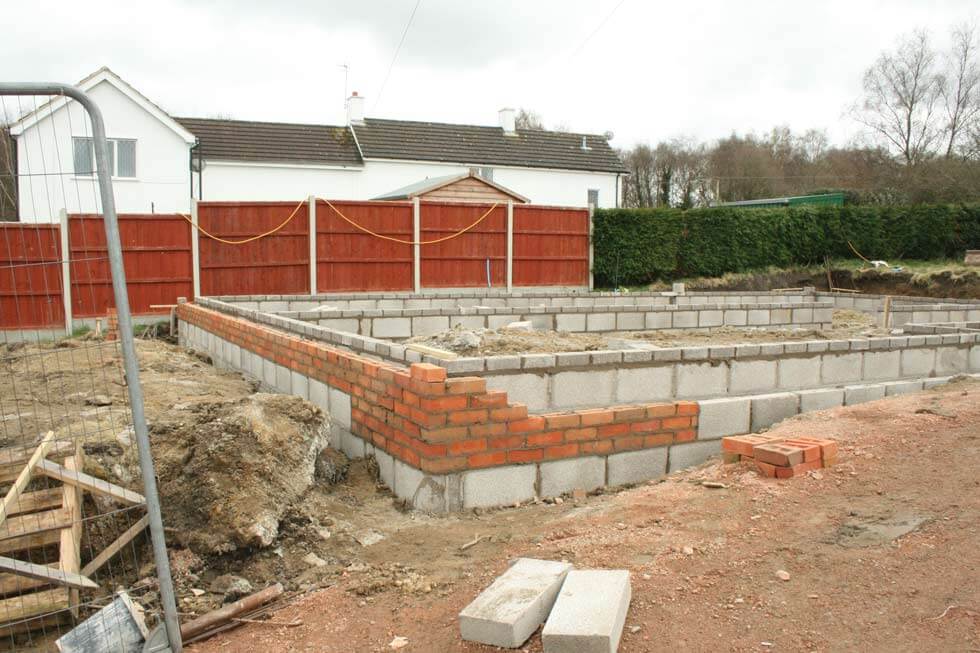
2. Foundations
At this stage the foundations need to be measured up and then excavated. The usual depth for foundations, or footings as commonly titled, are 1 meter, In essence until you find ‘good ground’. A clever tip when digging out foundations is to utilize an inexpensive tool called a string line, this is fixed to the existing building, and run across, all the way across where the new foundations are to be lay, this will ensure a straight line between the existing building and the new extension.
Once the foundations are dug, it is now time to lay the building blocks, which will host the walls and in turn roof of the extension. Typically anything over 3 degrees or rising is the minimum when setting blockwork and brickwork. If there is heavy rainfall, laying foundations can be a very tricky task, and run the risk of the newly created 1 meter deep trench backfilling, in this case appropriate rain protection needs to be erected, or a delay in work.
Our personal preference when laying foundation blockwork and brickwork is CEMEX readymix. Concrete has a useable life of around 1.5 hours. However, in the summer months it will lose workability more rapidly, so the useable life drops to around 1 hour.
Once the depth has been reached for the foundations, this is usually when the building inspector makes a visit, to check the footings and the ground reached. Typically footing levels tend to match with the existing footings of the existing building, however, properties 60+ years old, tend to have a far shallower foundation, typical 0.5 meter. In this case, the 1 meter rule is usually adhered to.
3. Building Walls – The Start
Just like when laying the blocks initially a string line is set up, to enable all brickwork is lay in line with the existing brickwork of the building working off of.
Mortar mix is then created on demand, in line with how quickly the bricklayer is working. Using a formula of 5 parts building sand and 1 part cement and finally addine (similar to washing up liquid!) and water, creating a very strong mix. A great mix should still have the imprint of any tool that is used to run through the concrete, if the concrete falls in on itself, when a trowel is ran through the mix, then the mix is too moist and sloppy.
A good mortar bed height is around 1/2 inch (10-12cm), this is the gap between each block mounted on top of one another. The extension drawings will dictate how big the blockwork needs to be, but typically blockwork is usually 100mm deep, the drawings will also reveal the cavity depth and insulation depth required for the build, this typically amounts to 100mm cavity and a 50mm insulation. Insulation should, usually, be fitted tight to the inner wall.
4. Building Walls – Exterior walls and matching
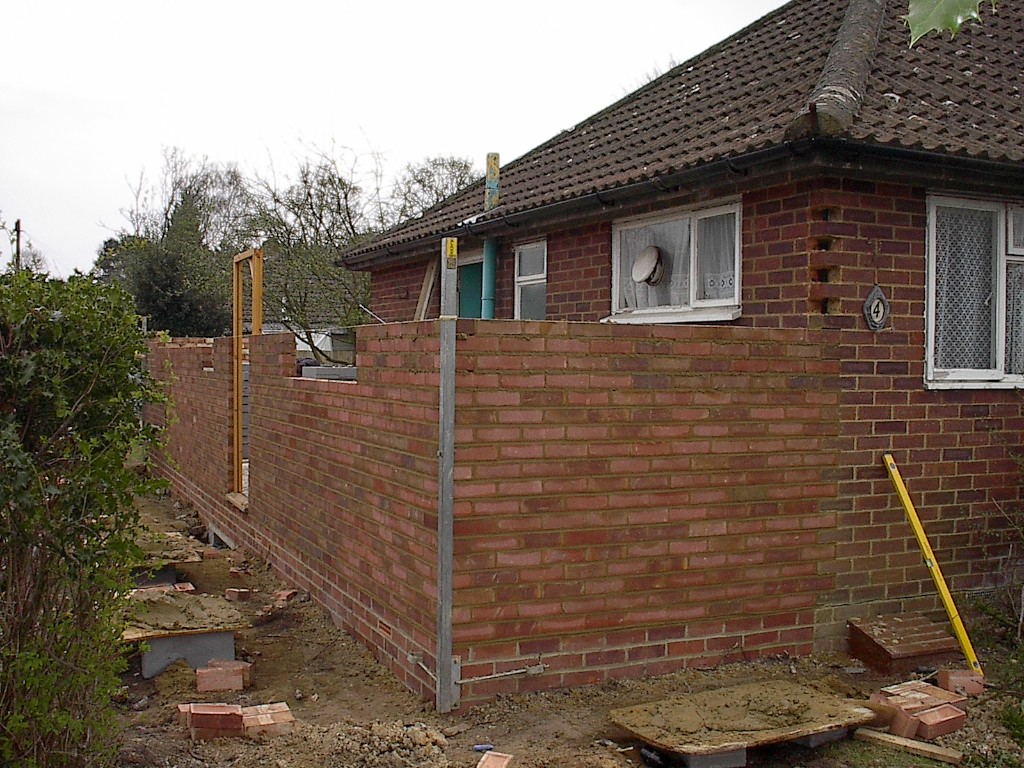
The Building blocks are the first to be lay and are laid to the level of where the damp proofing membrane is to be fitted, usually the same level as the existing damp proof course of the existing building. We like to use as close a match as possible to the brickwork of the existing property, to ensure continuity. Using a technique known as brick bonding, the brickwork (the house brickwork which is visible) is built up, to roof height. Brick bonding is essentially staggering the brickwork, so the brick directly below is not parallel meaning there is one straight, continuous, join all the way up the wall. This method is not as structural strong and reliable as the brick bonding method.
The lintels for the doors and windows are now fitted into position. Lintels are usually concrete or steel, these provide structural support for the roof or floor above. We prefer to use a lintel that has built in insulation, a Catnic Lintel.
There are typically two methods of joining in the new brickwork, with the existing brickwork;
- Simply cut a neat, straight, line in the existing brickwork and then using wall starters begin the new brickwork courses. We find this method, upon close Inspection, reveals a clear divide between the existing brickwork and the new brickwork. For this reason, we do not tend to adopt this approach.
- Cut around the existing brickwork and then add in the new brickwork, in a staggered form. In time as the new brickwork weathers, there will be little visual evidence to suggest the extension has been added retrospectively.
Once the brickwork is built up to the guide height, a piece of timber is fitted to the top, it should always be strapped down, and in turn the strap is fitted to the inner brickwork. This is what the roof ultimately sits on.

5. Supporting Steel Joists, Roof Trusses and Roof Tiles
Before anything the existing roof needs to be supported at the closest point to where the current roof is to be extended to the new roof.
A supply steel joist, identified by the structural engineer is then fitted, supporting the existing roof and the soon to be filled new roof. Following this, we then begin to position and fix the roof trusses around the extension, this is what ultimately holds the roof and tiles.
The roof is now built up and the tiles, once again picking tiles to match as best as possible with the tiles on the existing property, fitted. All but completing the build from above.
6. The Floor of the Extension
The most important point prior to laying the floor is setting the damp. As the blockwork rises from the footings, and reaches a point in line with the blockwork of the original building, the damp proof membrane is set at this point, all the way around the parameter of the blockwork. Building inspectors take a keen eye to where this is set. When damping is not set at the same height as the original building, this is referred to as ‘stepping’.
The damp proof membrane sits on top of the blockwork and directly under the first course of brickwork, the membrane then hangs over the blockwork and covers all the blockwork below the damp level and also sits on the soon to be floor. Damp proofing is a pivotal task, in order to stop any moisture from coming up.
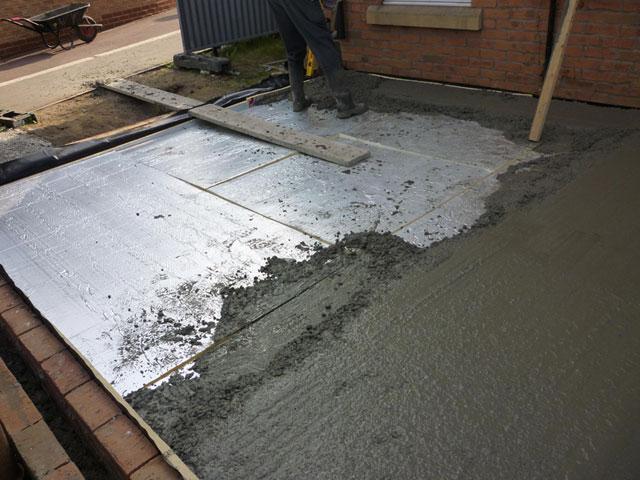
Good practice is to begin the new floor with lying 4” of hardcore down, by crushing rubble, unwanted bricks, and topped off with a cover of soft sand. Then using a Wacker to make compact, a 4-6” layer of concrete is poured to create oversite.
The insulation identified on the extension drawings is now selected and lay all across the newly lay concrete floor. Once the insulation is lay, timber is usually ran horizontally across the insulation provide the fixture points for the chipboard which in turn makes up the new floor. This floor will most often be run to the same height as the existing floor in the existing building.

7. First Fix Electrics
With the supporting steel joists and roof trusses comes the outline of the roof, the floor is also now in place. At this stage we like to carry out our first fix of the electrical installation. In short, this means pulling and appropriate rated cables for the fittings required in each room of the extension, for example;
- 5mm Twin and Earth cable for lighting circuits
- 5mm Twin and Earth cable for socket circuits
- 10mm Twin and Earth cable for shower circuits
- 10mm Twin and Earth cable for cooker circuits
The cables are clipped directly to the ceiling rafters, or run directly through the joists, and then left coiled between the joists, in the pre-designed locations, leaving enough excess cable so when it comes to the second fix (I.E. Fitting lights, sockets, switches) cables do not need to be extended.
Something we find, which tends to be overlooked by a lot of builders, is the load on the existing consumer unit. The newly built extension could potentially draw a considerable additional overall load (for example an electric shower at 40amps, a mains powered cooker at 40amps, sockets at 16amps and lights at 6 amps.) Our preference is to install a new feed and an accompanying, dedicated, consumer unit. This eradicates any chance of overloading the electrical supply and also presents with it reassurance that all electrical work carried out is completely new.

8. Plastering
Following the completion of the electrical first fix, including the installation of the appropriate backboxes (used to host the cables and fittings of sockets, light switches and fused spurs), the wet trade of plastering can begin, with the identification of the appropriate plastering method to be used. Plaster can be applied directly to blockwork / brickwork, using a PVA Glue application direct to the brickwork, then followed by numerous coats of finish directly on top of this glue. The alternative option is you can bond and then apply the plaster to the plasterboards which are fitted. Following the completion of the plastering work, the project really starts to take shape, the structure of the building has taken shape, with the outline now firmly taking shape.

9. Second Fix Electrics
At this point all cables are in place and the plastering has now been completed. The downlights, or batten type light holes are drilled and the cables which have been left in the correct locations are pulled through. The actual light fittings are now connected up, along with all the sockets, fuse spurs and switches. If the cooker and shower are mains fed, these connections may be left until the utilities are all in place. These tend not to be a particularly time consuming task.
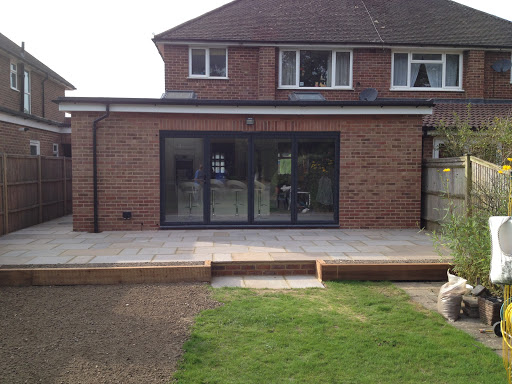
10. Snagging & Completion
The project at this stage, is now all but handed over. Typically a week or so prior to this stage in the schedule of works, we come together with our client and agree upon a snagging list. This is a list of all the final jobs required to successfully handover the successful extension project.
Items on a snag list tend be the following nature; Windows needing a good clean, hobs/oven needing a light clean, rubble in the garden removing, paint removed from the sides/floor, etc. We always endeavor to have no items appear on the snag list, however, we are realistic and do understand even with the greatest attention to detail, small things do occur.
A 1.5% figure is retained by the client until this list of snags is completed. Therefore, it’s in our best interests to complete every last item outlined as quickly and effectively as possible.
Following the completion of these works, all the relevant documentation are made available such as; Building Control completion documentation, Fensa paperwork (windows), Electrical certificates, warranty documentation, Gas certificates, etc.
The Building Inspector carries out his final check at this stage, signing off the project and producing the completion certificate.
Our Promises
Our Service
Being a family run business elevates our work; with our name and reputation on the line with each project we undertake, we truly believe our service is the best in the North West. Over 30 years of experience and combined 60 years of site experience from the full team, you are in safe hands.
Our Guarantee
All of our work, including labour and certain materials come with a FarrellWolst guarantee. We have pride in our works, and our guarantees are reflective of this.
Full Turn Key
Our varying skillsets uniquely enables us to provide a full turn key solution for most projects, meaning most work is carried out in house, with no external contractors needed. From Brickwork, to structural flooring, to electrics and plastering and final finishing, we pride ourselves on seeing a project all the way through, from design to completion.
Contact Us
- Shelley Street, Leigh, WN7 5EX
- hello@farrellwolst.co.uk
- 07434591517


